Friday, November 19, 2010

Replace Color & Auto Color

Here I change the hue, saturation and lightness by using replacement at the replace color.

I use the same file that I cropped before this to do this adjustment.

Make sure you zoom in. Use the "Magic Wand Tool" to selected the hat.

Go to Image > Adjustments > Replace Colour.

A replace color box will appear. Use the "Eyedropper Tool" to choose the original hat colour. Then go to the Add to Sample and click on the hat seeing the small box with white shape looking like a hat. Change the "Hue", "Saturation" & "Brightness". Now the hat is blue. Click "OK".

Right-hand click and "Deselect".

The picture will be like this.

Then, now to do the Auto Color....


Go to Image > Adjustments > Auto Color.

The picture will turn out like this.

Crop Tool-Straighten and Crop

This is how I use the crop tool....

Open the any image file. Click on the "Crop Tool".

Use the "Crop Tool" and adjust it like this.

Go to the side of the dotted line until you find the rotate sign. Turn and adjust the crop box until you get it with the picture accurately. Finally, press "ENTER".


The picture now is straighten and cropped.


Wednesday, November 17, 2010

Final Wallpaper

This is the final product of my wallpaper... I do not know weather it is ok or not but I tried to make it simple.

The final........


AT LAST, I FINISHED IT. THANKS TO SOME FRIENDS WHO HELP TEACH ME AND LEND THEIR PHOTOSHOP TO ME. FOR EVERYONE'S INFO, I AM USING PHOTOSHOP CS3 AND CS4 FOR THIS ASSIGNMENT.

Wallpaper in Process 4

Going to do the typography and finalize everything including adjustments.

Close the Lions layer. I move the lantern layer down with the "Move Tool" because I want to write some words on the top .


Go to the "Type Tool" and click on it. 


Type the wordings on the top of the wallpaper. The type layer will automatically open for you.

Go to "Colour picker" then select the colour I want which is the Yellow for the words.

Right hand click on the Type layer then click the Blending options.

Here I use "Outer Glow" for the Words on the top.

I finished doing the "Outer Glow" and I get the wordings as I want it to be.

Then, I use "Adjustments" on "Curve" to change brightness the left lion.

The "Curves" window will appear. Then you can adjust it anyway you like. Then click OK.

Now I place the Chinese character in the middle of the wallpaper.

Go to "Magic Wand tool" and selected the Chinese character which I need.

Right-hand click on the selected area. Then click on Layer via Copy.

A new layer will be formed. Close the main Chinese character layer so you just get the character and avoid the background.

I delete the background of the character leaving the character. I rename the layer to Chinese character now. I use the adjustment curves again but this time I just change the "Red channel". Then click OK.


I want to add special effects to the Chinese character so I right hand click on it's layer open the Blending Options.

I use "Outer Glow" and change the Gradient Editor taking purple colour.

Here is the outer glow as you can see.

I even added Drop Shadow. You can see the shadow behind the Chinese character.

Here I retouched the lion color using "Adjustment, Curves" as you can see it's darker now.

I did the same thing for the Second Lion (right one).

Since the Outer Glow before this is brighter, I made it less glowing now.

I also change a bit of the glow on the word, "Happy Chinese New Year".

Finally, finished....

 WALLPAPER COMPLETED....

Wallpaper in Process 3

I continue my wallpaper with trying to use the "Masking technique". It took me quite some time to understand it and I'm still fuzzy about it but still i prefer the "Eraser Tool". Masking is the same as using the "Eraser Tool". Make sure you are at the right layer before your proceed.

I want to erase the background of the left lion so, I make sure it's the "Lion 1" layer.

Go to the "Eraser Tool" on the Tool panel. Click on it.

Then, I erase the part I don't want which is the background.

Zoom in to the parts you cannot see and do the same thing.


Finally, we got the lion.


Monday, November 15, 2010

Wallpaper in Process 2

Continuing doing the wallpaper...

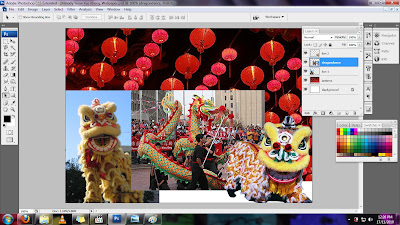
Here are the images I'm using for the wallpaper. Unfortunately, I planned to make it more simple so, now I decided to delete the dragon dance in the middle of the whole composition. 


Right-hand click and go to "Delete layer".


Then, click "OK".

It looks less crowded now which I think is better.


Here, I'm going to change the White background to "Red" colour. Make sure you are at the "Background Layer".


Click on the icon as shown to "Create a New Layer".


Then a new layer is created. 


To change the colour of the background, go to the colour picker at the left hand-side of the window. Click on it.


The colour picker will give out a colour box liks this. Choose any colour your prefer. I'm using red because it suits my wallpaper nicely. Then click "OK".


Select the "Paint Bucket Tool".


Click it on the white backgound and it changes to red.


To see if you get it, close other layers. Here is the red backgound. Rename the layer name as "Background 2" so you don't get confused if you make a new layer.

Chinese New Year Song